

I have vivid memories of attending ballet class as a little girl—desperately trying to force my tiny 5-year-old-body into the splits, to no avail.
My ballet career was very short-lived (read: I quit two years later). But, fast-forward nearly 20 years, and I’m still in the same predicament whenever I attend a barre class. My body just won’t do it.
All it takes is one glance around class to see I’m not the only one with this challenge, though. (Shout out to my non-flexible ladies!)
So I chatted with Rachelle Reed, Ph.D., barre kinesiologist at Pure Barre to find out to become a barre queen and finally master the splits:
Rule #1: Do not force it
Forcing yourself into the splits (ahem, 5-year-old me) is a seriously BAD idea. “You have to think about the fact that your muscles are elastic in nature, so if you stretch them too far before they’re ready, they can snap—sort of like a rubber band,” says Reed. “The last thing you want to do is injure yourself, especially in your hamstrings and hip flexors, so you really want to take your time, so you can avoid injury.”
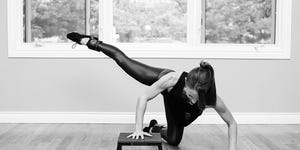
Shay Carreon Photography
Rule #2: Plan on practicing for months (sorry!)
“The way you’re going to gain flexibility is practicing,” says Reed. She recommends easing into the pose three times a week, for 20 seconds at a time, to help your muscles release into the stretch.
And this change won’t come overnight, or even after a week. “Realize it will probably take a couple of months of regular stretching to get yourself to get there,” says Reed.
Rule #3: Get your body nice and warm first
Static stretching is something researchers recommend you do after a workout when your body is warmed up. “It helps improve your flexibility, and increase range of motion in your joints, which can help reduce the risk of injury,” says Reed. “It will help make your muscles more pliable and ready to be stretched to their maximum capacity.”


That doesn’t mean you need to go for a 10-mile run, or crank out an entire Pure Barre workout to prep your body. Even a walk will do, says Reed.
If you’re still working your way to the full splits, Reed recommends trying some warmup stretches to help you prepare:
Standing hamstring stretch
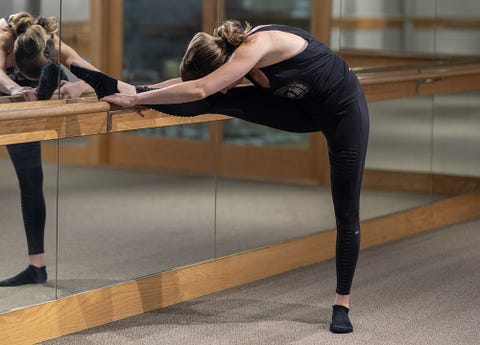
Shay Carreon Photography
“This stretches the back of your leg and hip flexors. In a barre class you’ll use the barre. It’s the same version, but standing.”
How to: Place your right foot on top of a bench, counter, or ballet barre, directly in front of your right hip. Your left foot should be directly under your left hip. Keeping your chest lifted, gently bend forward at the hips until you feel a gentle stretch in the back of your hamstring. Hold for 20 seconds. Repeat two to three times.
Forward fold
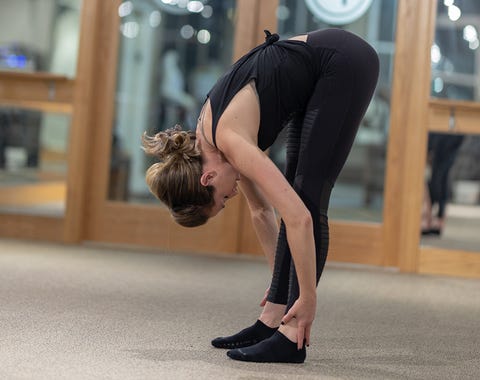
Shay Carreon Photography
“This is really great for opening up the backs of your legs.”
How to: Stand with feet parallel and slightly wider than your hips, your spine tall and a soft bend in your knees. Lift your butt toward the air as you fold your torso over your legs, bringing your chest as close to your legs as possible and the crown of your head toward the mat. Lengthen with each inhale by reaching for the floor; relax and settle into the pose with each exhale. Hold for 20 seconds. Repeat two to three times.
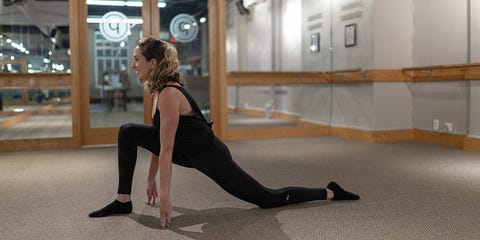
Low Lunge
Shay Carreon Photography
“This is a great way to stretch the back of your thigh, the hamstrings, which can get very tight because we sit so much during the day. And this stretch isn’t that far away from doing the full splits.”
How to: Stand with your feet hip-width apart, arms at your sides. Step forward with your right foot. Bend forward from the waist and press your fingertips to the floor on each side of your right foot. Bend your knees slightly and step back with your left leg into a low lunge. Let your left shin rest on the floor, and sink your hips low. Hold for 20 seconds. Repeat two to three times.
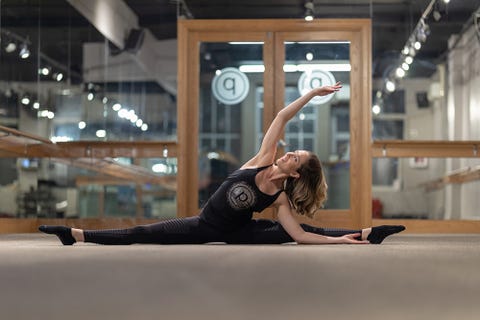
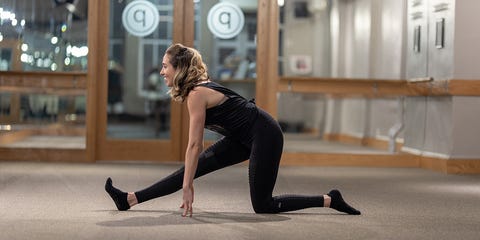
How to do the splits
From a low lunge position, extend your front leg and shift your weight back. This will stretch the other hamstring.
Shay Carreon Photography
From here, try sliding your back leg back behind you. Then, using your hands (or blocks) as buffers, lower your body down towards the floor until you start to feel a pull in your hamstring.
Shay Carreon Photography
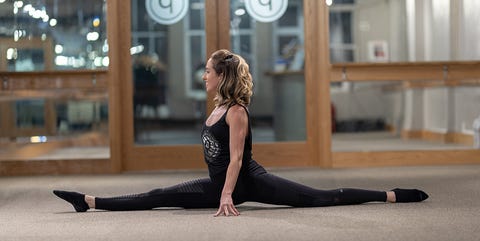
Once you can finally reach the floor, make sure your core is engaged, to help you stay upright, advises Reed. Have your chest lifted, with your shoulders over your hips, and your gaze straightforward. This way, you’re not collapsing forward. Also try to square your hips.
“As you’re learning, your legs will be bent,” says Reed. “But the goal is to get your legs completely straight.”
Word of caution
If you’ve had any kind of hamstring injury, Reed recommends you talk to your doctor before making the splits one of your #fitgoals. “But for most people, as long as they’re progressing slowly, and not forcing themselves into this, then this stretch is more than okay.”
Source: Read Full Article