
Bodyweight workouts can be efficient and effective, but they’re not always flashy. The old standard pushup, squat, plank trifecta won’t win you many accolades on the ‘Gram (which is great, if just getting into shape is your goal). But if you want to take on an exercise that will turn heads, you’ll need to ramp up the technical challenge and difficulty with a move like the pistol squat.
Thankfully, the pistol squat is an exercise well worth the time and effort it takes to master. You’ll need to have high levels of mobility, stability, and strength to pull it off at all, but unlike some ridiculous hyped-up moves like stunt burpees, the pistol squat offers real-world benefits, helping you to build unilateral strength and honing your balance and coordination.
“The pistol squat is the hardest squat to learn,” says Beau Whitman, a trainer and former gymnast. Whitman will provide you with a plan to use so that you can take on the move using smart, progressive steps. “Importantly, we have to talk about how to counteract the weight and balance on one leg.”

One quick note of warning: If you have any lower body issues—especially with your knees or ankles—you might want to sit this one out. Try working with a physical therapist or coach to work through your injuries, then come back to try this once you’re all cleared.
What Is a Pistol Squat?
First, you need to know the difference between a basic single-leg squat and a pistol squat. The former is any squat on one leg where your hip crease is just above your knee crease. It doesn’t matter what your front leg is doing.
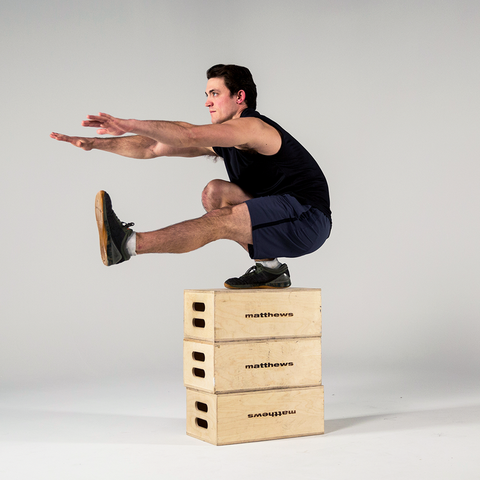
The pistol, on the other hand, is a rock-bottom squat that puts you in a position on one leg where your hamstring rests on your calf and your other leg is straight out in front of you. This is what we’re striving for; the challenge is being able to go as low as you can, then stand up using your own power without toppling over.
When to Do the Pistol Squat
When you’re working up to the full movement, Whitman recommends working on the mobility drills every day (that will help more than just your pistol squats, too).
Hone your form with the progressions three to four days per week, especially on leg and full-body workout days. Once you can nail the movement, keep it in your repertoire for lower body routines, working with low reps and limited sets—something like 3 sets of 5 reps on each leg to start.
Pistol Squat Prep Work
Before jumping into the progressions, Whitman starts with a body assessment, working from the bottom up.
Ankle Assessment
If you struggle with the test, try this ankle mobility drill.
Hip Assessment
If you struggle with this test, try hip mobility stretches like these.
After you’ve assessed your ankles and hips, it’s time to get warmed up.
Ankle Warmup
Hip Warmup
Once you’re finished with the stretching, you’re ready to start on the pistol squat progressions.
The Pistol Squat Progression Plan
Now, you’re ready to work your way up to the full pistol squat. Make sure to focus on hitting the proper depths as you work through the progressions—if you don’t focus on doing the work correctly, you won’t be able to pull off the move properly at the end.
First Progression
Air Squat
3 sets of 10 reps
Second Progression
Close Feet Squat
3 sets of 10 reps
Third Progression
Eccentric Single-Leg Squat (on bench)
5 controlled reps per leg
Fourth Progression
Single-Leg Box Squats
10 reps per leg at each height
Fifth Progression
Toe Squat
6 to 8 reps per leg
Sixth Progression
Floater Squat
6 to 8 reps per leg
Once you’ve mastered each of these progressions, you’ll be ready for the real thing. When it comes time to try out the full pistol for the first time, don’t be afraid of failure. Make sure you work with the proper tempo—Whitman want you to lower down slowly, so you are able to demonstrate control through each phase of the movement.
Source: Read Full Article