Are sore wrists stopping you from flowing through downward dog to cobra? We asked the experts how to practise yoga while taking the pressure off injured or overworked wrists.
We put our poor wrists through a lot. Lifting, pressing, tapping away at a laptop – if it involves your hands, your wrists are there right behind them, bearing the brunt and getting sore, achy and possibly inflamed in the process. And what’s that weird clicking sound? If you must know, it’s the pop of dissolved gasses inside your joint fluid (I challenge you to read all about that without wincing).
You may have taken to the yoga mat, your usual go-to for relief from aches and pains, but then realised what a star role wrists play. Common postures such as downward dog, plank and cobra, put a lot of pressure on wrists. Even poses that don’t require your wrists to bear your weight involve some kind of clasping and pulling at feet, elbows and thighs, all of which adds to the pain.
So, how can we keep showing up to the mat while giving our wrists a well-needed rest? We asked the experts for their tips on practising yoga with sore wrists and how to strengthen those hardworking joints.
You may also like
Wrist pain during strength training: how to protect your wrists
Engage your legs, knees and forearms instead of your wrists
“Yoga is a great form of exercise for those with weaker wrists,” assures Gemma Soul, head of yoga at Psycle. “There are many standing poses that don’t involve holding weight on your hands. Try lunges, warrior poses and standing balances for a great flow that will give your wrists time to recover.”
Szabina, yoga teacher at MotivatePT, agrees that sore wrists are not an obstacle. She tells Stylist: “The good news is that just because you can’t lean on your wrists, it doesn’t mean you can’t explore, strengthen and grow in other ways. You don’t have to stop doing yoga.”
She recommends trying a more relaxing restorative yoga sequence, yin yoga or a modified version of hatha yoga involving seated poses such as camel, child’s pose and a seated cat/cow combination.
Yoga teacher Eloise Skinner also recommends a leg or seat-based approach. “Sequences can be based around standing postures such as a warrior-focused flow or floor-based postures for a more yin-style flow,” she says while also suggesting some wrist-friendly swaps.
“For instance, you could replace a full wheel backbend with a bridge, a downward dog with a dolphin or a high plank with a forearm-based plank.”
Modify your favourite yoga moves
Modifying your favourite asanas and transitions can help if you want to continue with a particular sequence that you enjoy.
Mara Cimatoribus, yoga teacher and contributor to fitness app WeGlow, recommends getting creative with your flow. “Instead of practising the cat/cow combination from a tabletop position, you can do it while kneeling or standing with your knees bent and hands placed on your thighs.
“Avoid any vinyasa transitions that involve putting weight onto the wrists and instead move from mountain pose straight to a standing pose or warrior three straight to a high lunge.”
Gently reintroduce wrists to your practice
It’s a catch-22 situation: sometimes wrists are sore because they are weak, and weak wrists need exercise to strengthen, but exercise hurts… However, once you’re not experiencing any serious pain in your wrists, it’s time to carefully reintroduce them to your yoga practice to help gain strength and avoid future injuries.
Ensure you warm-up your wrists before any exercise with gentle rotations and shakes (as if drying your hands). Kat Pither, yoga teacher and founder of Yogi Bare, recommends a warm-up sequence: “Move onto your hands and knees and gently rock and lean your weight over the wrists. Move forward and back, side to side and also try flipping the palm face-side up. Go easy!”
You may also like
5 common yoga problems, from wrist pain to poor balance, fixed by an expert
Adrienne Everett, yoga instructor and SWTC featured expert, has a couple of go-to postures for relieving sore wrists. She tells Stylist: “One of my favourite poses for this is gorilla. It allows you to relieve stress on the wrists while controlling the pressure you place on them by shifting your body weight. Another great pose I would recommend is tabletop, which allows you to stack your shoulders over your wrists to strengthen their mobility. You can also make variations with the wrists with palms facing outward or upward.”
However, when reintroducing wrists to your practice, she warns: “Honour your body and listen to how your wrists feel during your yoga practice. Don’t overexert, and make necessary pose variations to prevent damage.”
4 wrist-free poses to try today
Dolphin (makarasana)
- Essentially a forearm-based version of downward dog. Begin on your knees with your forearms parallel on the floor, under your shoulders.
- Push your tailbone towards the sky while reaching your heels to the ground.
- Let your head hang between your shoulders and breathe.
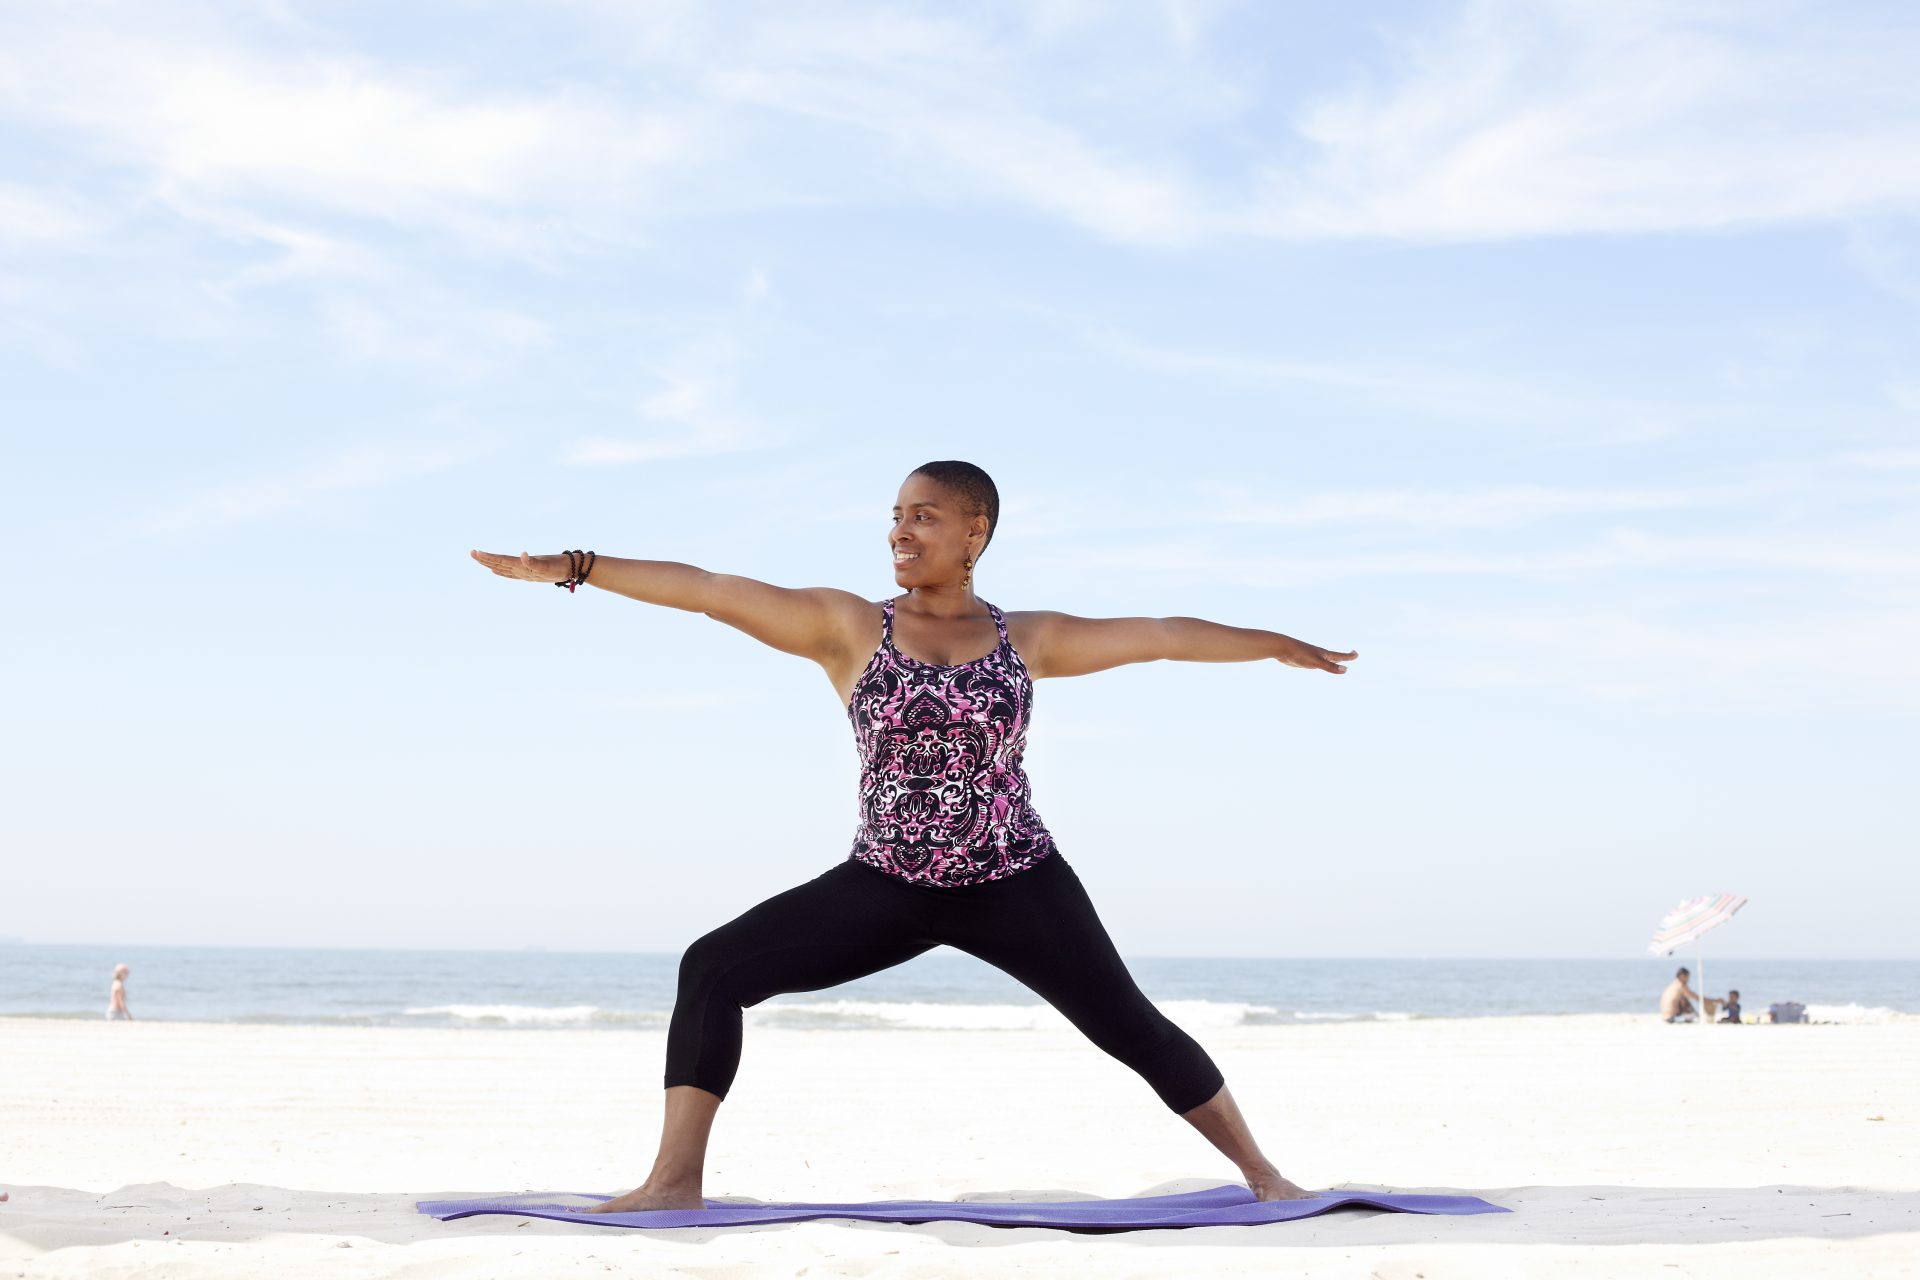
Warrior 2 (virabhadrasana 2)
- This lunge can be practised individually or as part of a standing-based flow and warrior 1 and 3.
- For warrior 2, stand with legs wide and arms at shoulder height. Turn one foot out and the other to a 45 degree angle.
- Turn towards the outward-facing foot and bend the front knee, keeping the back leg straight.
- Ensure the knee is directly over the ankle and the torso is upright.
- Gaze along the leading arm and breathe.

Bridge (setu bandha sarvangasana)
- For an alternative to wheel, begin by lying on the floor with knees bent, heels close to the sitting bones and arms parallel to your sides, palms down.
- Slowly push up from your feet and lift the pelvis towards the sky, curling the back until you’re resting on your shoulders. Avoid clasping the hands when you have sore wrists.
- Breathe deeply in this position, before slowly uncurling the spine back towards the floor.
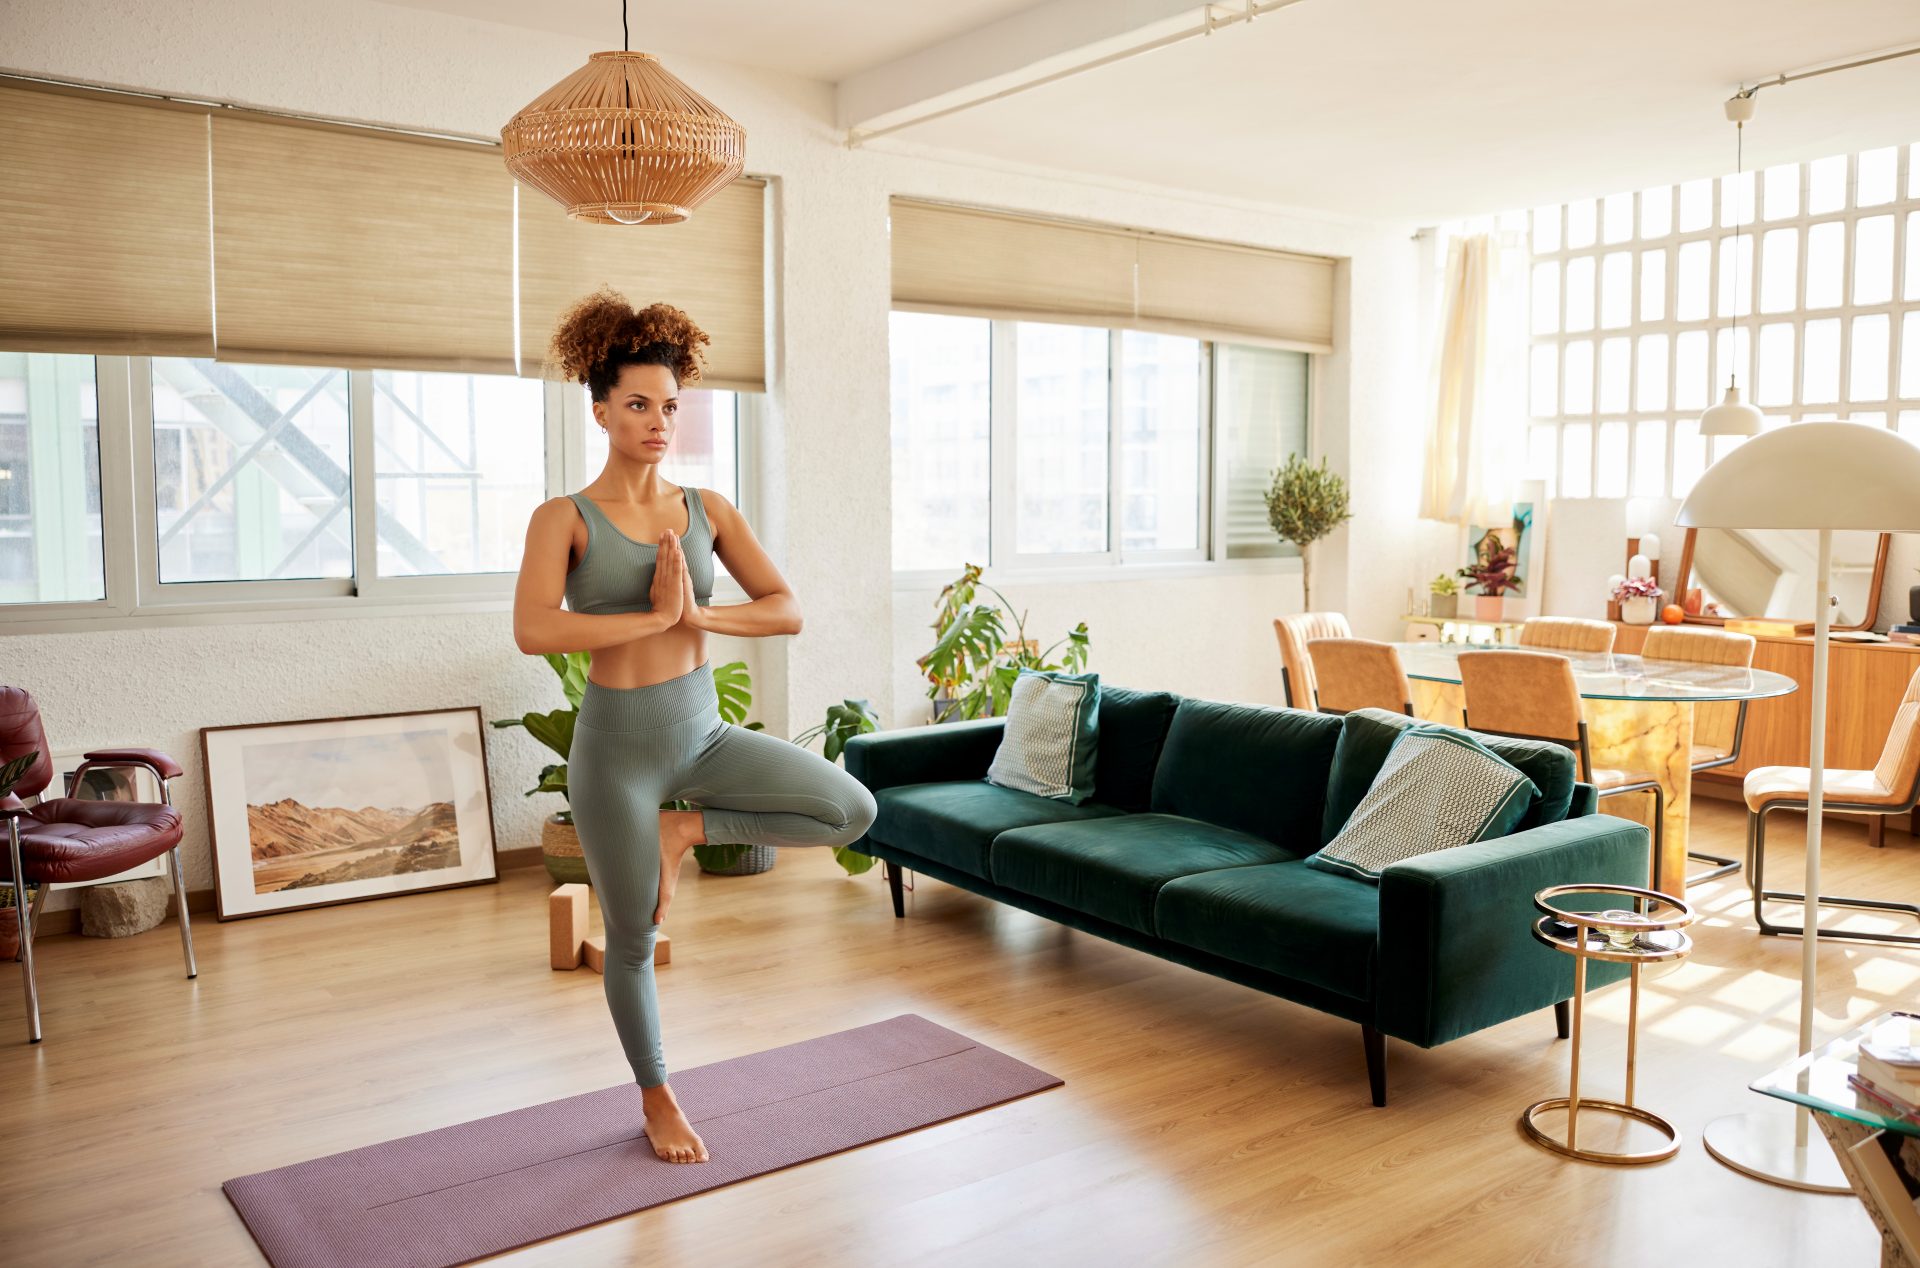
Tree pose (vrksasana)
- Start this balance by standing tall. Transfer your weight to one leg while lifting your foot to rest, as high as is comfortable, on your straight leg (avoid placing directly on the knee).
- Ensure your bent knee is stretched out to the side.
- Gently place hands in prayer position at the heart, before raising your arms towards the sky with hands above shoulders, palms facing in.
- Pick a gaze point and stay balanced for several breaths.

How to deal with wrist pain, according to an osteopath
It’s important not to simply work around your wrist pain and ignore the cause. Osteopath Anisha Joshi of Osteo Allies says that wrist pain can be a symptom of a range of issues including repetitive strain injury, hypermobility (when joints lack stability) and compression within carpal tunnel syndrome as well as straightforward trauma after a breakage. But you can do some simple exercises to relieve sore wrists alongside your yoga practice.
She tells Stylist: “Grab a tennis ball or similar and gently squeeze into the ball and relax. Repeat this a few times each day and it can help with the pain. You can also do resistance and strength training with your wrists. For instance, hold a small weight, like a tin of beans or a dumbbell. With your elbow at your side, wrap your other hand around it. Then lift the weight in a bicep curl.”
Wrists still hurting? Joshi adds, “If your wrist is severely inflamed, you’re unable to move it or you can’t sleep due to the pain, then you must get it looked at by a GP, osteopath or physio.”
Images: Getty
Source: Read Full Article
